
Collecting + Gathering: What You’ll Need
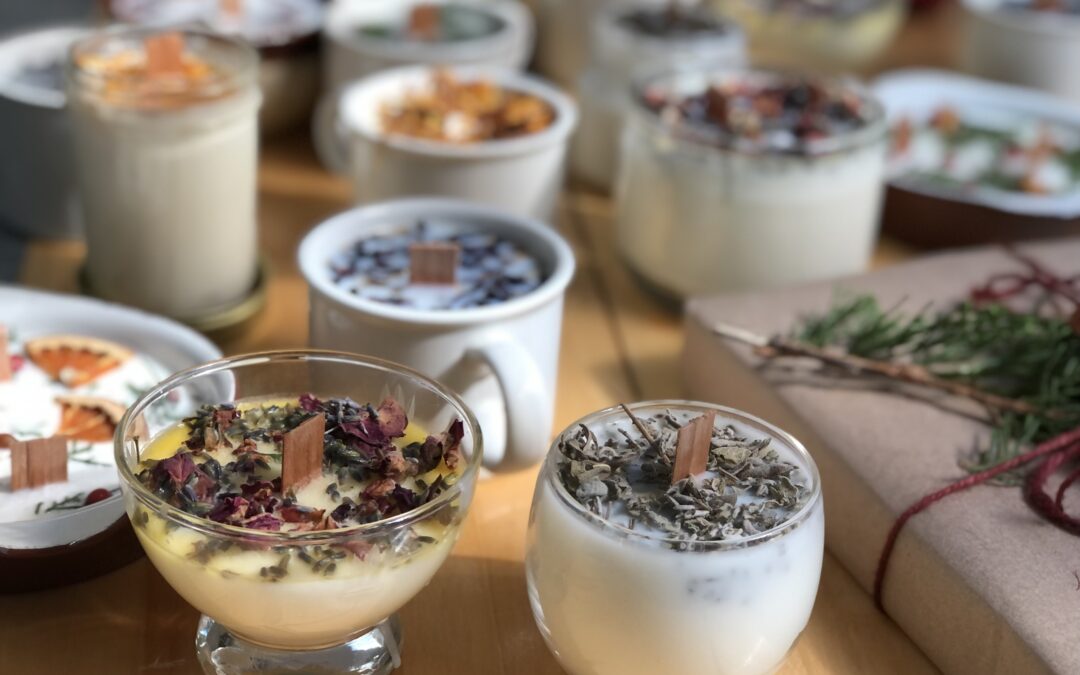
I absolutely love making candles – from the slow melt of the golden wax, the mixing and matching of essential oils, and the arranging beautiful loose dried herbs on the top at just the right moment – each step in the process brings me to a new level of DIY peace & harmony.
Only a few items are needed to get you started. Many of these items can be picked up second-hand – breathing new life into discarded mugs, bowls, pots & muffin pans – ensuring your candle gifts are truly one-of-a-kind.
- Essential Oils – I love Pranarom Certified Organic Essential Oils. (There are so many great scent options to try during the holidays from Peppermint to Scotch Pine to Balsam Fir, and so many more!)
- Loose Herbs – New Morning Market carries a wide and beautiful variety of loose herbs. Have fun mixing and matching, add dried calendula to your lemon-scented candles or gorgeous, downy sage to your sandalwood-scented candle. The perfectly dried rosebuds and lavender are stunning on top of any floral-scented candle.
- Dried Goods – Gather citrus rings or crushed cinnamon sticks if using warmer/homestead inspired scents like cinnamon bark.
- Foraged Finds – Take in all that nature has to offer and collect seasonal goodness like pine needles, holly berries or bay berries.
- Double Boiler – I use an old stock pot and a metal pitcher.
- Candle Containers – If you’re hand-delivering your candles, you can use an array of second-hand bowls, mason jars, glasses and mugs. I suggest metal tins if you’re shipping your candles. Old tea tins are my favorite rugged & travel friendly container to reuse.
- Wax – You can buy soy or beeswax in bulk at most craft supply shops. You can also melt down the wax from old candles using your double boiler (just be sure to pick out the old wicks using tweezers, avoiding any skin contact with the melted wax).
- Wicks – I recommend sustainably crafted wood wicks which can be purchased at most craft supply shops. Wood Wicks get a bad rap, but you just need to light them near the wax (bottom vs top of wick) and they’ll burn beautifully for you!
- Silicone Pan – mini-muffin (or small shaped) pan for making wax melts with extra wax. These are great gifts for anyone with a wax melt warmer. No wicks, no fire, but the same warm scents.

Melting + Mixing + Making
There are many wonderful resources available online and at your local library for candle making – from wax to scent ratio, wick size needs, how to mix scents and the best temperatures for introducing scents. I recommend doing a little more research before you get started to find a process that works best for you. (But don’t worry, you don’t have to be a pro to figure it all out!)
When making candles for family & friends, I recommend using a “lightly scented” method just in case they are not fully committed to the same scents that you are. Scents like pine, peppermint and citrus are the most universally loved, while a mix of rose and lavender is often well-loved for those who enjoy a more floral scent for their home.
- Add water into the larger pot of your double boiler (a shallow amount – just enough to heat the smaller pot).
- Place wax in the smaller pot of your double boilers (when making a large batch of candles for gifts, I fill the small pot with wax vs using a precise measurement – making wax melts with any extra wax).
- Place the small pot in the large pot and place over a medium heat on your stove-top.
- While waiting for the wax to melt, prepare your candle holders by placing wicks in the containers.
- Melt wax completely then remove the small pot with melted wax from the larger pot and set aside, allowing it to cool for about 5 minutes.
- Carefully pour the wax into your prepared candle containers, replacing or rearranging the wick as needed (wood wicks with metal holders may slip & slide during this process – carefully move back to center, avoiding any skin contact with the hot wax).
- Add about 75 drops of essential oil to each container. (Note: I add my oil to my candle container once the wax is poured and not to my wax batch in my double boiler. This allows me to make different scented candles with each batch.)
- Let candles sit until almost solid – adding herbs before the candle has slightly solidified will lead to dropped herbs in the wax and unwanted air pockets. The herbs should be able to sit on top of the wax without falling through, but the wax should still be tender enough to allow the herb to dry with the wax on the top layer.
- Let the candles cure in a safe place for 3-5 days
- Cut wood wicks about 1 inch above the wax.

More Recipes

Grass-Fed Beef Stew Skillet Pie
Clean Comfort Cooking with New Morning Market Grass fed cows free-roam the fields of their ranches and eat a diet of fresh grass. Grass fed and grass finished beef, like Thousand Hills Lifetime Grazed 100% Grass Fed Beef, are never fed grain of any kind, resulting in...

Slow Cooked Grass Fed Flank Steak Tacos
Clean Comfort Cooking with New Morning Market Grass fed cows free-roam the fields of their ranches and eat a diet of fresh grass. Grass fed and grass finished beef, like Thousand Hills Lifetime Grazed 100% Grass Fed Beef, are never fed grain of any kind, resulting in...

Grass Fed Muffin Pan Meatloaf
Clean Comfort Cooking with New Morning Market Grass fed cows free-roam the fields of their ranches and eat a diet of fresh grass. Grass fed and grass finished beef, like Thousand Hills Lifetime Grazed 100% Grass Fed Beef, are never fed grain of any kind, resulting in...
Recent Comments